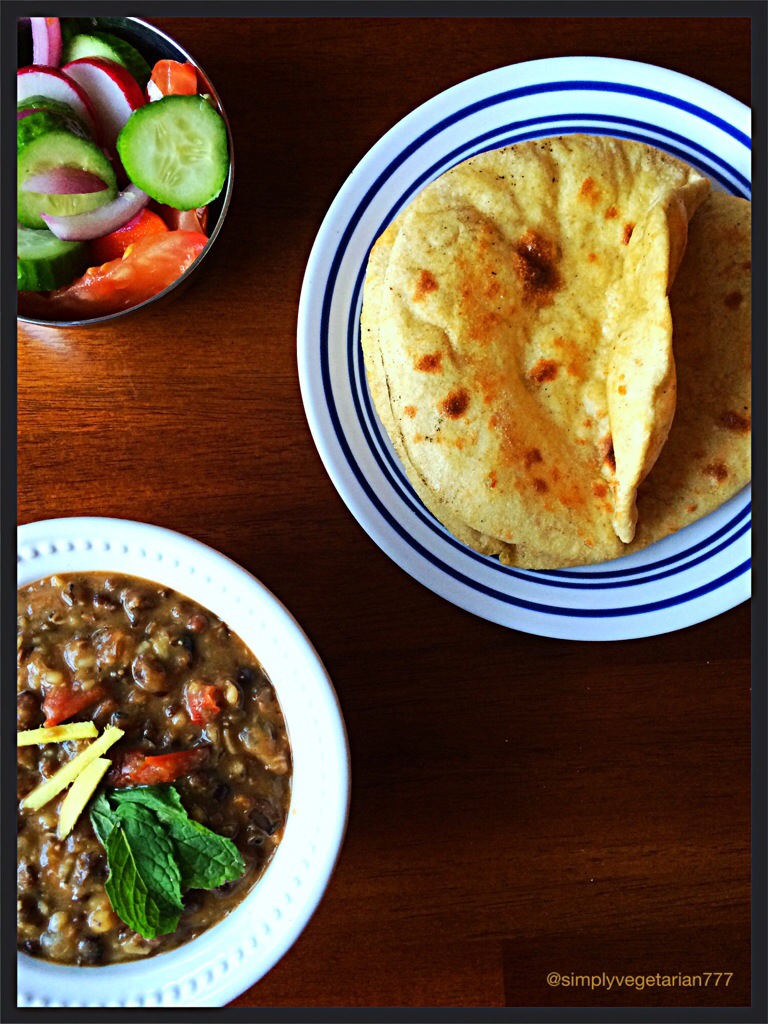
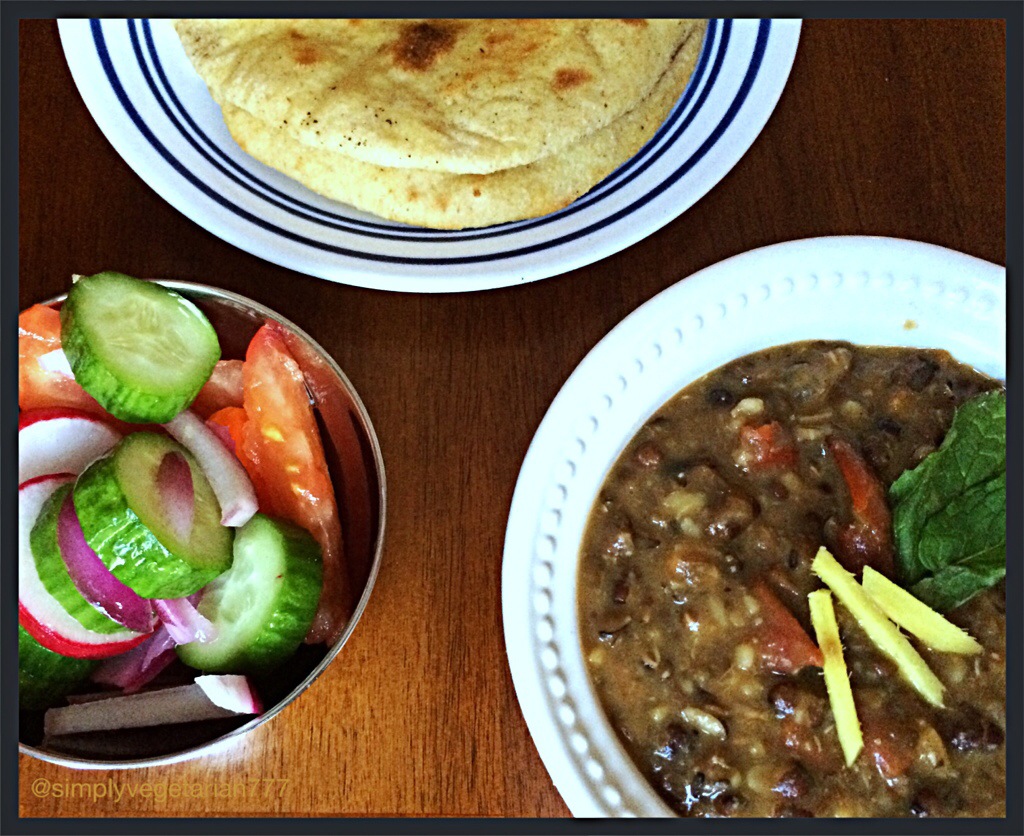
Dal Amritsari and Oven Baked Tandoori Roti
As an Amazon Associate and member of other affiliate programs, I earn from qualifying purchases.
Dal Amritsari is very commonly known as Langarwali Dal and/or Dhaba Dal. If you are wondering about these words as Dal, Amritsari, Dhaba and Langar, then here is some info.
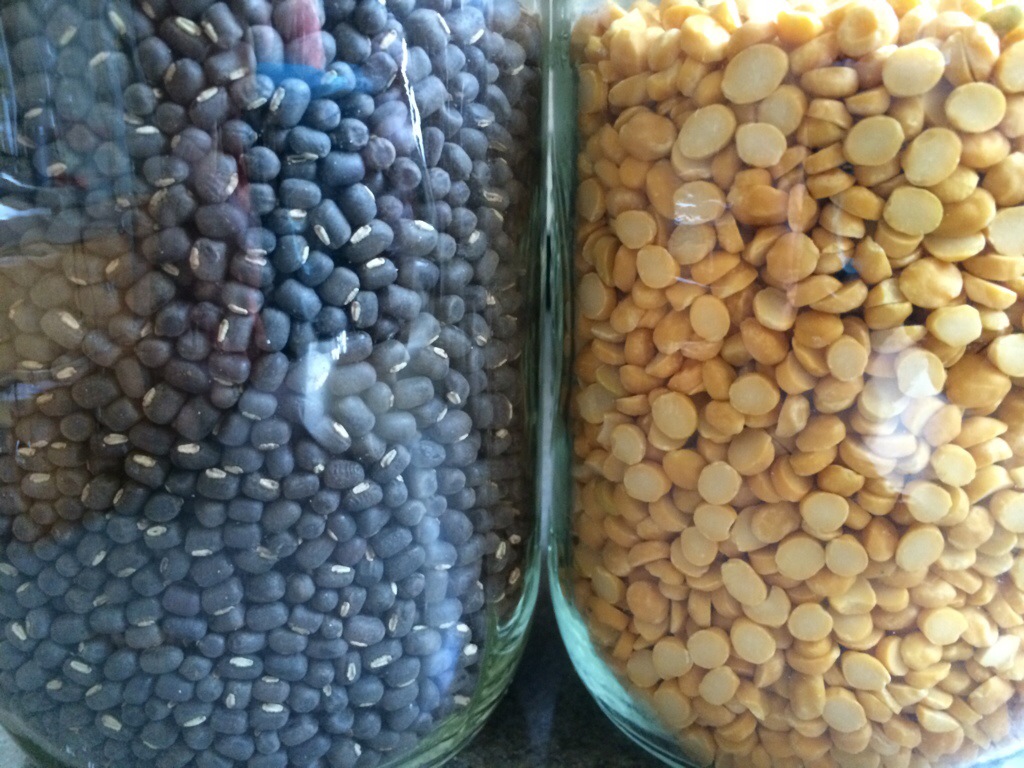
Dal is dried pulse/bean and in this case I have used Whole Urad and split Chana. The black one is whole urad and yellow one is split chana.
Amritsari is derived from Amritsar. It is a holy city for Sikhs where Golden Temple is established and people from all over the world come here for a visit. This city is at the border of Indian and Pakistan and is a witness of lot of history. Langar is like any soup kitchen in churches. It is a trend that whoever visits Golden Temple, never goes empty stomach. The kitchen of the temple is ways on and feed people on this dal and rotis/flat breads.
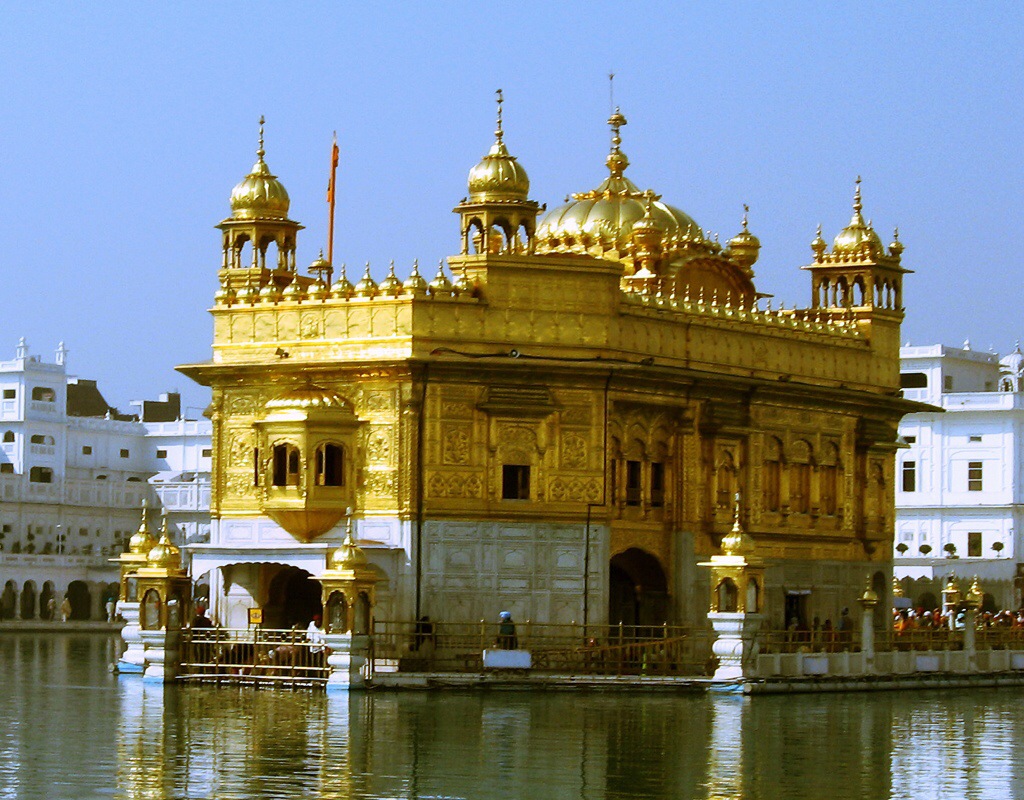
A glimpse of holy and gorgeous Golden Temple. Image courtesy : Google Images
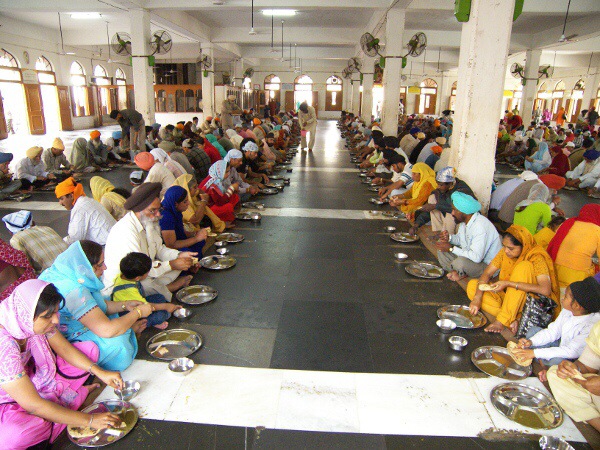
A glimpse of Langar/Soup Kitchen at Golden Temple. Image courtesy : Google Images
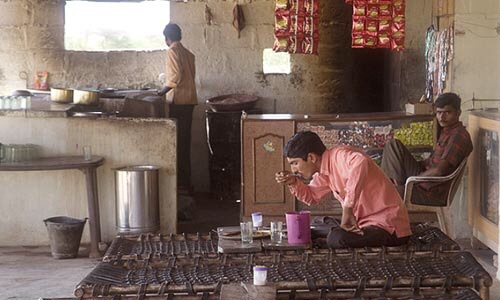
Now comes the Dhaba :). Dhaba is Diner in simple words, where there is a menu of the day and is served likely. It is a road side eatery for tired travelers, an eatery where you get a lot for your money and some delicious food. I pity myself that I can’t eat that now when I visit India, because of stomach issues. The food is simply finger licking :). Slurrp. This dal is a staple in many dhabas along with dal tadka. Some pictures of Dhaba now :). Image Source : Google Images.

A good introduction? Let’s get onto the fingerlicking recipes now!
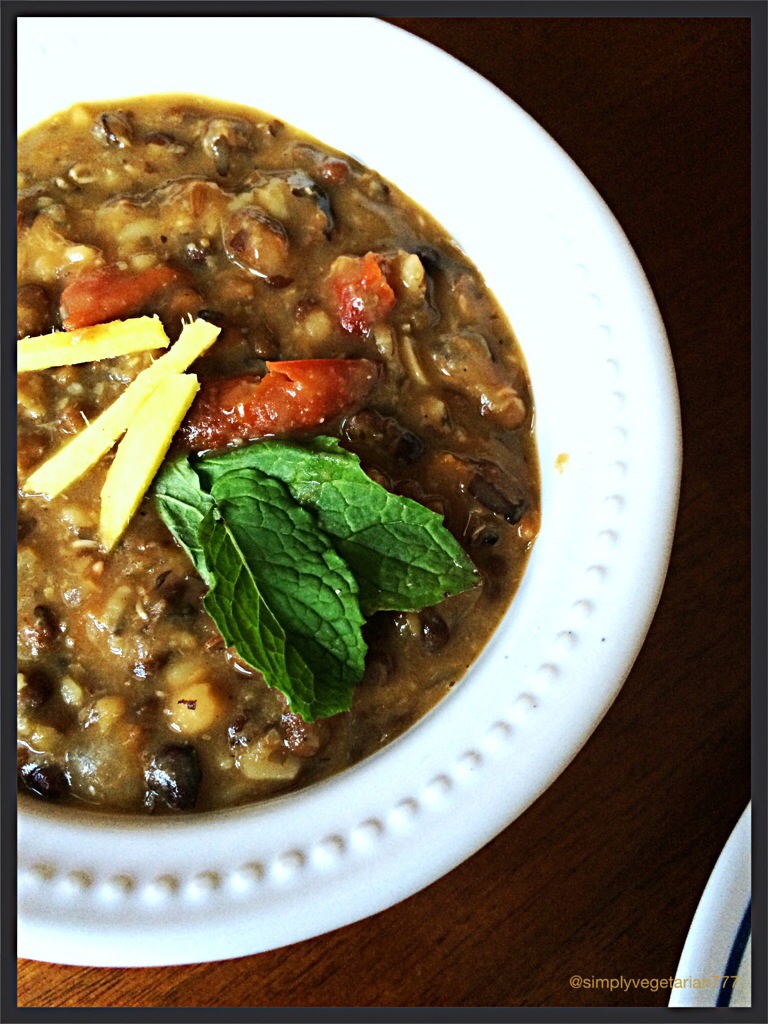
Dal Amritsari
Kitchen Equipments Required : pressure cooker or a big and deep saucepan, a big frying pan or wok, masher or hand blender, spatula, chopping board, knife.
Ingredients :
Urad Whole : 1 cup
Chana split (begal gram split) : 1/4 cup
Oil or Ghee : 2 tsp
Onion : 1 small chopped fine
Tomatoes : 2 chopped fine
Ginger : 1 small piece
Green or red dry chili : 1-2
Mint leaves : 8-10
Cumin seeds : 1 tsp
Red chili powder : 1/4 to 1/2 tsp, as per taste
Cumin powder : 1&1/2 tsp
Salt to taste
Water : 5-6 cups
Method :
1. Prepping the Dal for cooking :
Wash both the dried beans thoroughly under cold water and soak in 5-6 cups of water for 6 hours atleast. I decided the last minute, so I soaked mine in hot water in a pressure cooker with weight on for 1 hour.
Now this is a tip to remember when you forget to soak your whole lentils or beans to cook next time. Soak in hot water in a pressure cooker with weight on but without putting it on fire. for the people who do not have a pressure cooker, just soak in boiling water for 1 hour in a tightly closed pan.
2. Cooking the Dal :
Pressure cooking : Cook the soaked dal with its water (it is washed already), in pressure cooker for 20 minutes including the first whistle. Just lower the heat after the first whistle and cook in simmer with weight on.
Pan cooking : if you are cooking in pan, then cook the dal till it is quite mushy. Adjust the water accordingly. We are not looking for a lot of liquid here.
3. Putting the Dal together : Find a short video attached at the bottom, to understand the basic.
Heat the oil in wok or frying pan. Add cumin seeds. Once they crackle add whole red chili at this point. Now add onions, mint leaves and ginger to the oil. Sauté on medium heat till I in turns slightly red and golden. Now add chopped tomatoes along with cumin powder, red chili powder and salt. Mix well. Cover with lid and cook for 8-10 minutes till the tomatoes are mushy and the ingredients come together as a paste.
Now treat the dal with a hand or potato masher or hand held blender to give it a thicker and creamier look. Don’t over do it. You frill want a grainy texture.
Add the slightly mushed dal to the onion tomato paste. Mix well. Cover and cook for 10-15 minutes till it looks like a good marriage. Dal is ready.
Recommendations : You can eat it with rice, naan, any kind of flat bread, eat it as a stew, or best goes with tawa roti and tandoori roti.
Video Link for Amritsari Dal :
http://magis.to/fT15WkRCAF06IXwBDmEwCXp6?utm_source=magisto&utm_medium=email&utm_campaign=producer_shared_movie
Tandoori Roti
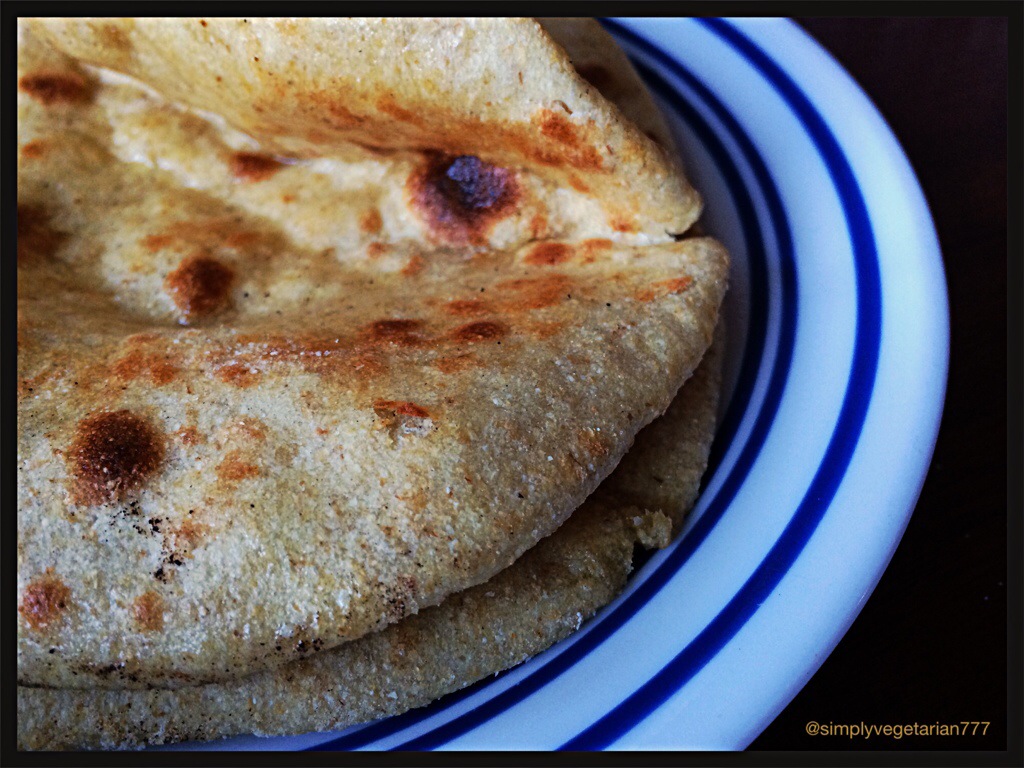
Tandoor is a clay oven, used for making breads and roasting vegetables and grilling meat. The technique is constant high heat. Here is an image to check out, source is Google Images.
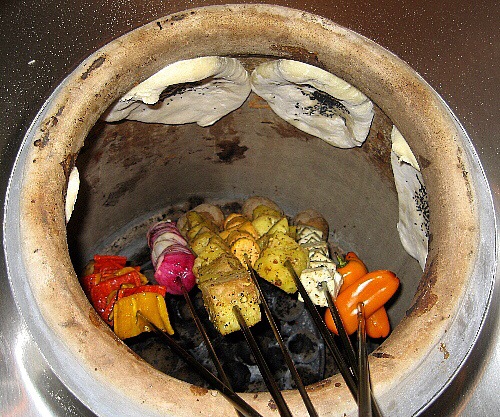
Since I don’t have a tandoor in my yard ;), I used my oven at broiling point and voila, good tandoori kind oven baked rotis/ flatbreads were there :).
Kitchen Equipments Required : a bowl, oven, baking sheet, rolling pin and rolling board (optional), a tortillas keeper with a kitchen towel lined.
Ingredients :
Whole wheat flour : 2 cups. You may use refined flour or 50/50 of both.
Salt : 3/4 tsp
Baking soda : a fat pinch
Yogurt : 2 tbsp
Warm water : to knead
Butter/ghee to brush on top
Method :
- Take flour in the bowl. Mix salt and baking soda well into the flour.
- Make a well in the middle. Add yogurt and 1/2 cup of warm water and start mixing with hands to make a soft dough. Add more water as required. It should use somewhere near to/less than 1 cup of warm water. Add slowly and a bit at a time. Pull the dough together. Knead for 2 minutes and then set aside, uncovered for 5-7 minutes. Then get back and knead for 4-5 minutes more till it is soft and pliable.
-
Set the oven to grill or broil. Adjust the top rack near to the broil on the top shelf.
-
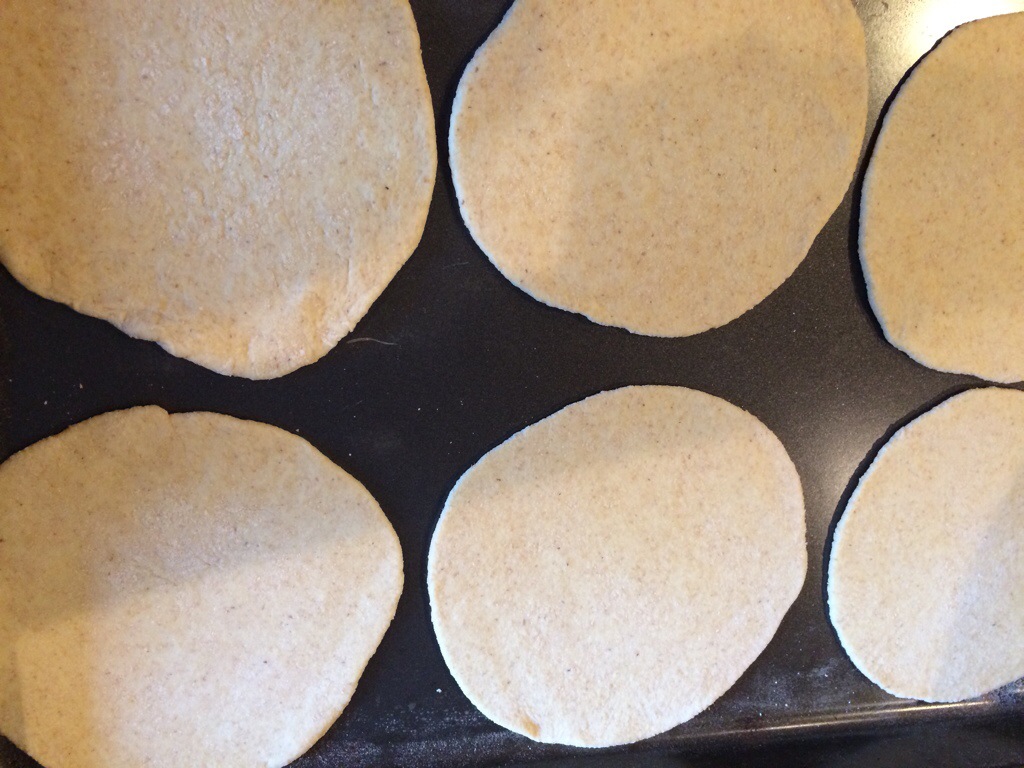
Pinch more than a golf size dough. Roll it into a 1/4 inch thick circle or oblong. Don’t roll it too thin or it will become too crispy and hard. Place the rolled out Rotis on baking sheet.

-
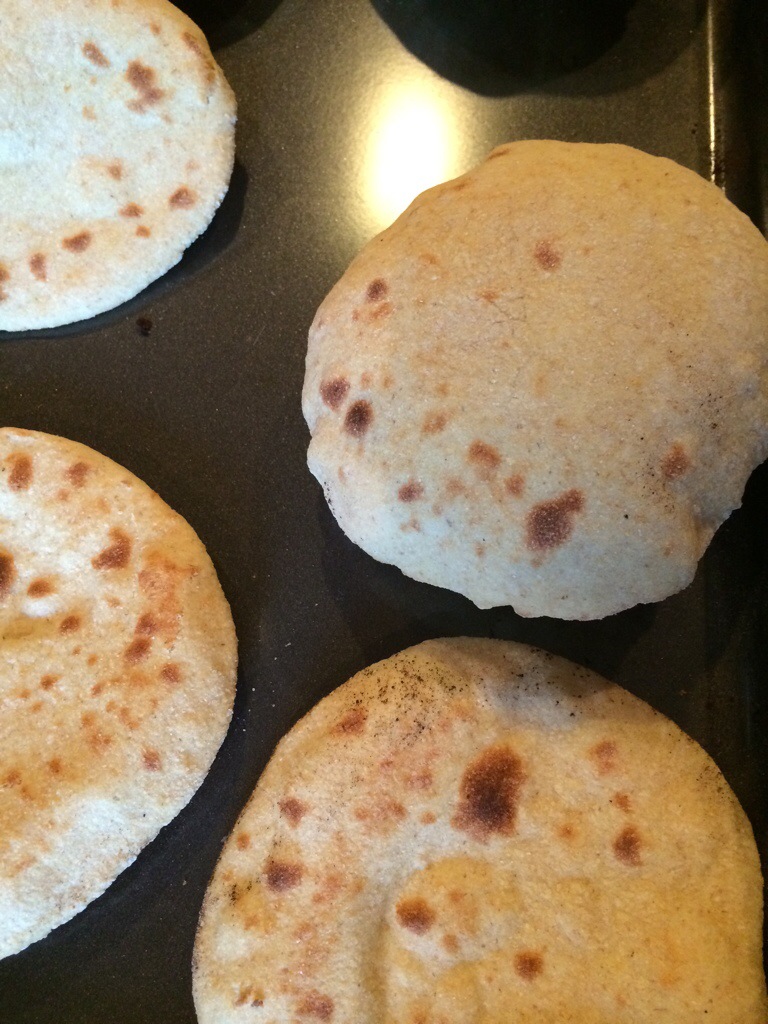
Put the baking tray in the oven. It will start puffing up..or might not..don’t worry. Will start developing brown spots. Take it out. Flip on the other side and broil till brown spots develop. It takes 1&1/2 to 2 minutes each side. Keep an eye all the time. Don’t leave the sight and don’t burn your hands.

-
As soon as the rotis come out, splatter butter or ghee and immediately store in the tortillas keeper, tightly closed. They are crispy so these are not good for keeping or storing. Best when eaten fresh :).
Enjoy the whole meal with a side of fresh salad drizzled with some lemon juice and salt.
Do try and let me know your reviews. My family loved it and I hope yours will too :).
Sonal
Disclaimer : I don’t claim any authenticity to the recipe. After a lot reading and research on the recipes, I concluded mine. Also, the aim is not to offend anybody’s religion.
Nice post Sonal. I have some whole urad dhal that I have been waiting to use in a recipe other than Dal Makhani. Will sure try your Amritsari dhal.
This is terrific n I m speechless for dis Sonu babs.
Hats off to dis creation ☆☆☆
Hi…are the roti kept in convection mode in oven? What is the temperature that shld be set?
Nithyalakshmi, I have no idea about the convection oven. I had made thes in my large oven with broiling/grilling option. You can make these in OTG or convection if it has grilling option.
I’ll be making the tandoori roti. Will give you feedback!
:). Will wait for your feedback. Just a reminder that it has to be consumed while warm or immediately wrap in cloth towel to retain the softness or it will become hard.
Hi Sonal, I am just catching up on all your wonderful posts and this one stood out to me. It threw me back to my visit to amritsar and the pictures of the communal eating just lifted me. I went into the kitchens and saw machines and men (young and old) throwing fresh roti off them and cooking them to perfection. I loved the massive pots of bubbling dhal and you have refreshed all of that beautifully.
How in the world do you find time to post so well and regularly with a full family to look after? Amazing x
Deena,
I am touched with your humility and comment :). Langar is an absolutely fantastic feeling! The blog is my solace to tired body and mind. It does suck my energy out but I love it.
The rotis look so hearty!
sona, the magician :* 🙂 as usual ……awesome !!
Your roti look so tender and fluffy, Sonal. Oh yummm.
What a wonderful meal and I love the details and background xx
Thanks Elaine. Few posts need more work and time. It was a tiring but worth post.
Very xx
Is Dal Amritsari similar to Egyptian Ful Medames, Sonal? I have tasted Ful Medames twice and it seemed good to me. I wonder if they are close when it comes to similarity of the taste. 🙂
Jhuls, the procedure seem to be same of cooking both the beans. Just checked the recipe. Ful madames is made with dried fava beans, whereas this dal is made with two totally different beans. The texture could be same but not the taste. I would be cooking ful madames soon for Ramadan observing people, and would update you soon.
I will be one those Ramadan observing people, so you’d cook for me, too? 😀 I will try that as well some other time. 🙂
Really? :). For sure! I am planning to make Mujadarra also. Interested?
Hmm, never heard of that. 😀 You introduce me. 🙂
It’s a rice and lentil dish
I’d be glad to know more about them. 😉 Happy weekend, Sonal. <3
Beautiful recipes, I love Dal and I love Tandoori Roti, so good. Nice pictures too, Sonal 🙂
Mmmmm… delicious and that bread looks incredible. I love the dal and have never had it prepared that way before. Wonderful recipes. the bread is so easy I must try it.
Sure..These are simple yet delicious recipes. This kind of bread is very similar to Khobz or unconventional pita.
I have never tried oven baking naan or rotis. Must do soon. The whole meal looks so homely and absolutely amazing 🙂
It was so delicious Anjana. The dal taste dos much better today..:)
beautiful recipes, Sonal and a great job on the video too! The tandoori rotis look like they were baked in a tandoor, I need to try this method!
Lovely Sonal – Loved the intro with those gorgeous photos and the recipes sound fabulous. I don’t know where you find the time to blog and photograph like you do with three kids too! You are amazing x
Yeah 3 kids including my husband ;). Thanks Selma. You are super awesome and your comments make my day.
Oven baked roti is grt idea:)
Try it Vidya and let me know.
Sure Sonal:)
Made same dal for dinner , love to grab Roti though.
🙂
I love amritsari dal n tandoori toting as I blong to tht place n n really it tastes yum …..I always make naan or roti in electric tandoor wid tadka dal ….
Lovely share dear ….now u have made dis amritsari daal roti more famous through ur blog n really u r amazing person who takes out her precious tym to write it fr others n sharing it ….hats off to u n love u dear